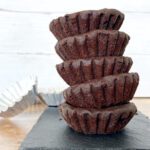
Chocolate Spelt Pastry Tartlet Shells
These rather unusual homemade chocolate spelt pastry tartlet shells allow you to create your own mini tarts and pies at home. The sweet, cocoa-flavored pastry dough can be made with gluten free, all-purpose, and of course, spelt flour.
Servings: 14 tartlet cases
Ingredients
- 180g (1½ cups) spelt flour (see note 1)
- 50g (¼ cup + 3 tbs) cocoa
- 50g (¼ cup + 1 tbs) icing / powdered sugar
- 150g (½ cup + 3 tbs) cold butter (chopped into small bits)
- 1 egg yolk (medium)
- cold water (only if needed)
Instructions
- Add the flour, cocoa and icing sugar to a large bowl (or stand mixer bowl).
- Add the chopped butter and either by hand (using the rub in method) or with the help of a stand mixer, mix the ingredients together. See my main post for further information.
- When the ingredients resemble a crumble-like consistency, it is ready. Don't overwork at this stage; it's perfectly fine to have large pieces of butter.
- Add the egg yolk and mix in. Your ingredients will start to pull together as a dough.
- If necessary, add one or two tablespoons of cold water. However, before doing so, make sure the egg has been fully incorporated. Your dough should be smooth and neither sticky nor too dry (where it falls apart). If you do need a little water, add just a touch at a time.
- Shape the pastry into a rough ball and cover with clingfilm.
- Place in the fridge for at least one hour.
- When the dough is ready, pre-heat the oven to 175℃ (350℉).
- Roll out your dough to around ½ cm (¼ ") - see note 2.
- Using a round cutter slightly bigger than your cases or moulds, cut out 14 circles - see note 3.
- Place each circle carefully into each case. Make sure you place it evenly in the tin, and allow gravity to do its work (rather than forcing the pastry in).
- Gently push the pastry against the sides and bottom.
- Place back in the fridge for 15 minutes.
- Before placing the tartlet cases in the oven, prick all over the bottoms with a fork.
- Place your tartlet cases onto a large oven tray, and then bake for 15 minutes in the lower part of the oven.
- Remove from the oven. It's possible that the middles of the tartlets have puffed up (especially if the pastry is quite thick). If so, just gently push down with the back of a spoon while still hot.
- Allow to cool completely and then move to the fridge. Let them rest for several hours before filling them. Alternatively pop them in the freezer until you need them. Enjoy!
Notes
I have converted grams to cups/ounces/tablespoons using online converters. Although I have no reason to believe they are inaccurate, please be aware that I have not made this recipe with imperial measurements.
- You can use spelt, all-purpose or even gluten free flour for this recipe (just use the same amount).
- My dough is thick. If you would like your tartlet shells to be thinner, just roll it out a little more. Take care though, as the dough is quite delicate, especially when warm. To help, you might need to roll the dough in between two sheets of baking paper.
- My round cutter measures 7cm (2 ¾") and my tartlet shells are 8cm (just under 3 ¼"). If you don't have specific tartlet tins, you can use a regular muffin tin.
